ANAMORPHIC POST-PRODUCTION WORKFLOW
(Adobe Premiere Pro)
This page is a quick walkthrough for:
Prepping Premiere Pro Timeline for Anamorphic Footage
Creating Proxies
LUTs and Playback
Export and Prep for Color Session
Disclaimer: This is the best workflow that I have found based on experience. Consider consulting a professional editor or technician for other options that may be more suitable for your project. Technical production specs are at the bottom of the page if you need a reference.
ARRI WORKFLOW:
3.4k Open Gate Technical Specs (Preferred):
Camera Sensor: Arri Alexa Mini
Codec: ProRes 422(HQ)
Resolution: ARRIRAW Open Gate 3.4K: 3424 x 2202
Anamorphic Squeeze Factor: 2x ( Zeiss Arri Masters, Cooke, Lomo, Kowa, Atlas Orion)
Note: Shoot 3.4k Open Gate internally to utilize the full sensor size, then externally de-squeeze on the monitor.
2.8k Technical Specs:
Camera Sensor: Arri Alexa Mini
Codec: ProRes 422(HQ)
Resolution: ProRes 2.39:1 2K Anamorphic: 2048 x 858
Anamorphic Squeeze Factor: 2x ( Zeiss Arri Masters, Cooke, Lomo, Kowa, Atlas Orion)
1. Prepping Premiere Pro Timeline for Anamorphic Footage
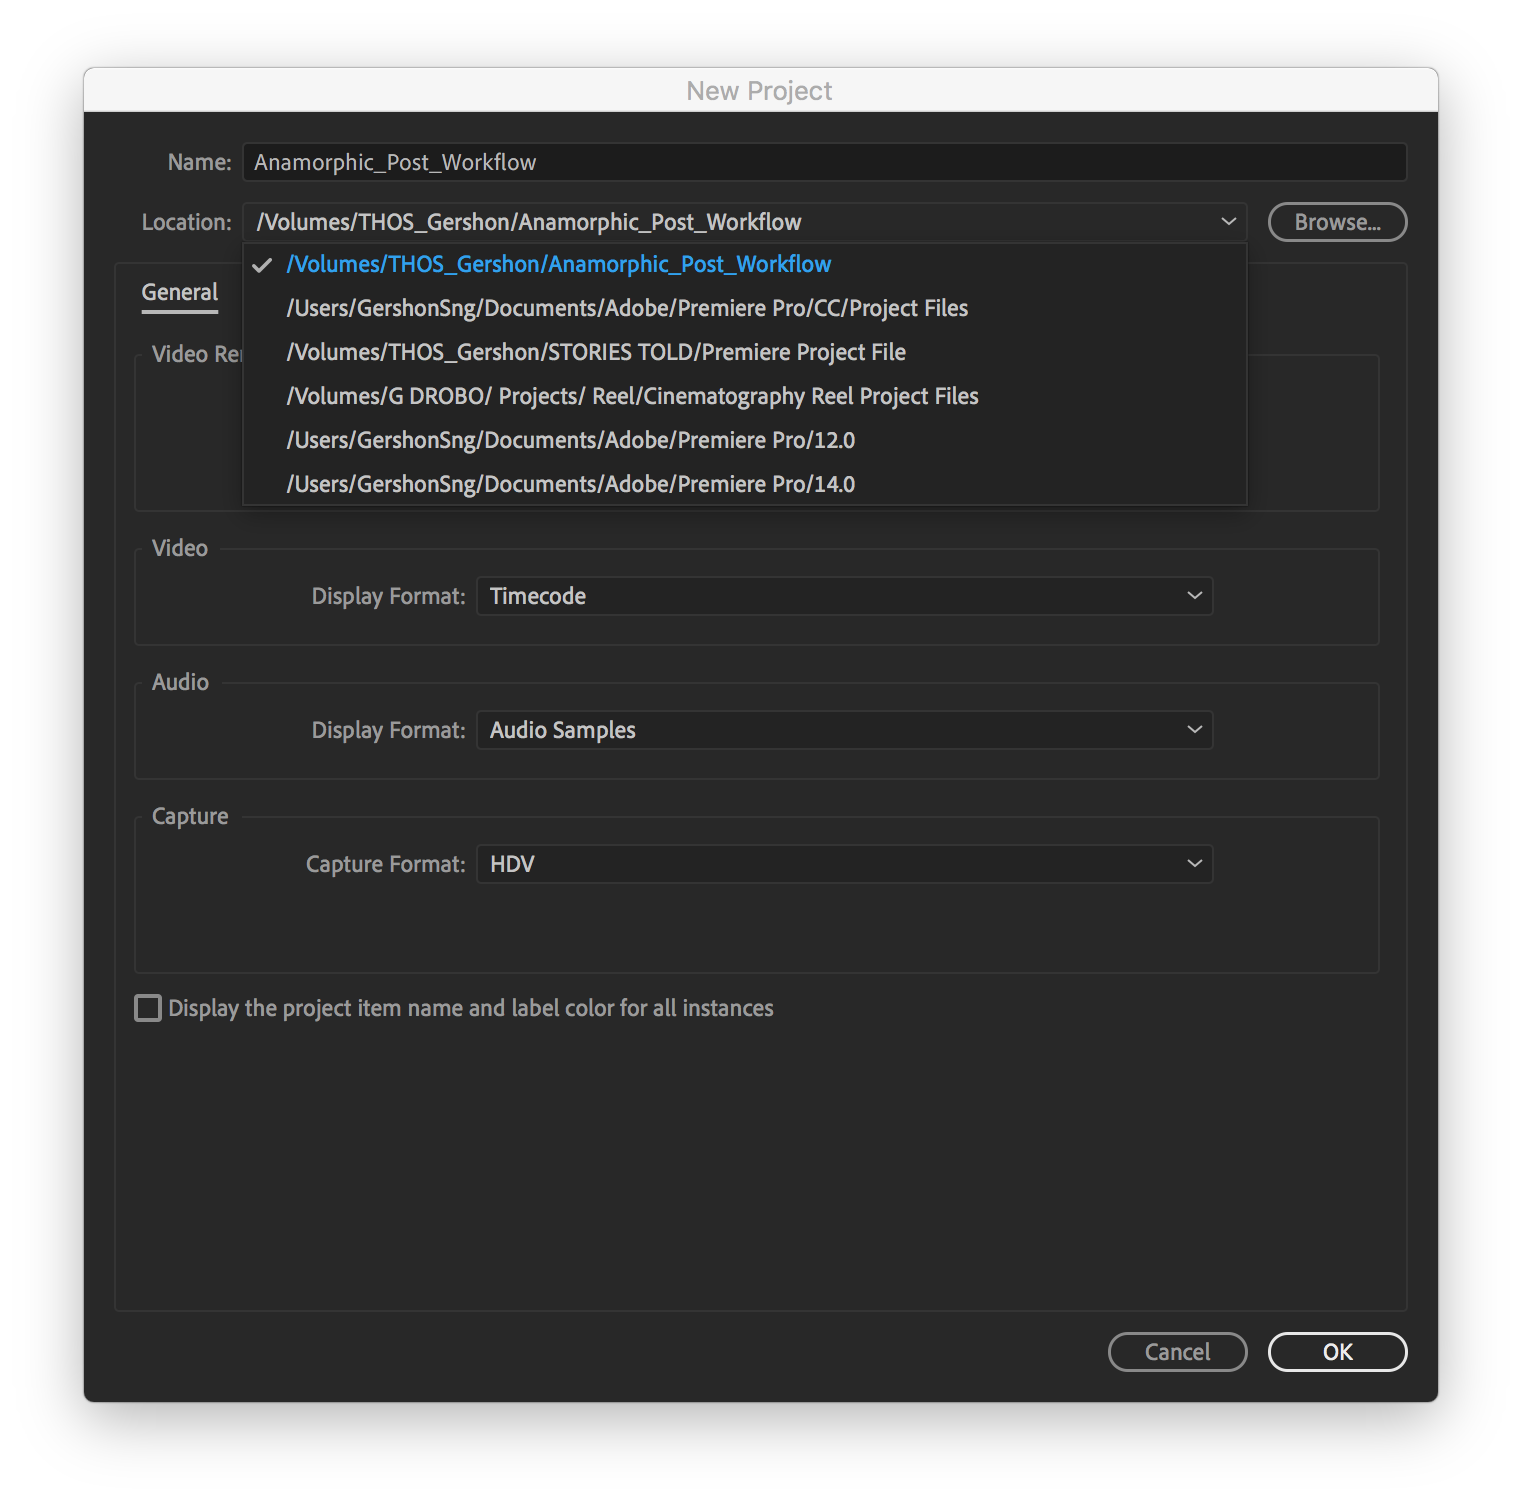
Step 1: Create a New Project
Standard set up workflow of your preference: Name, Location, etc.
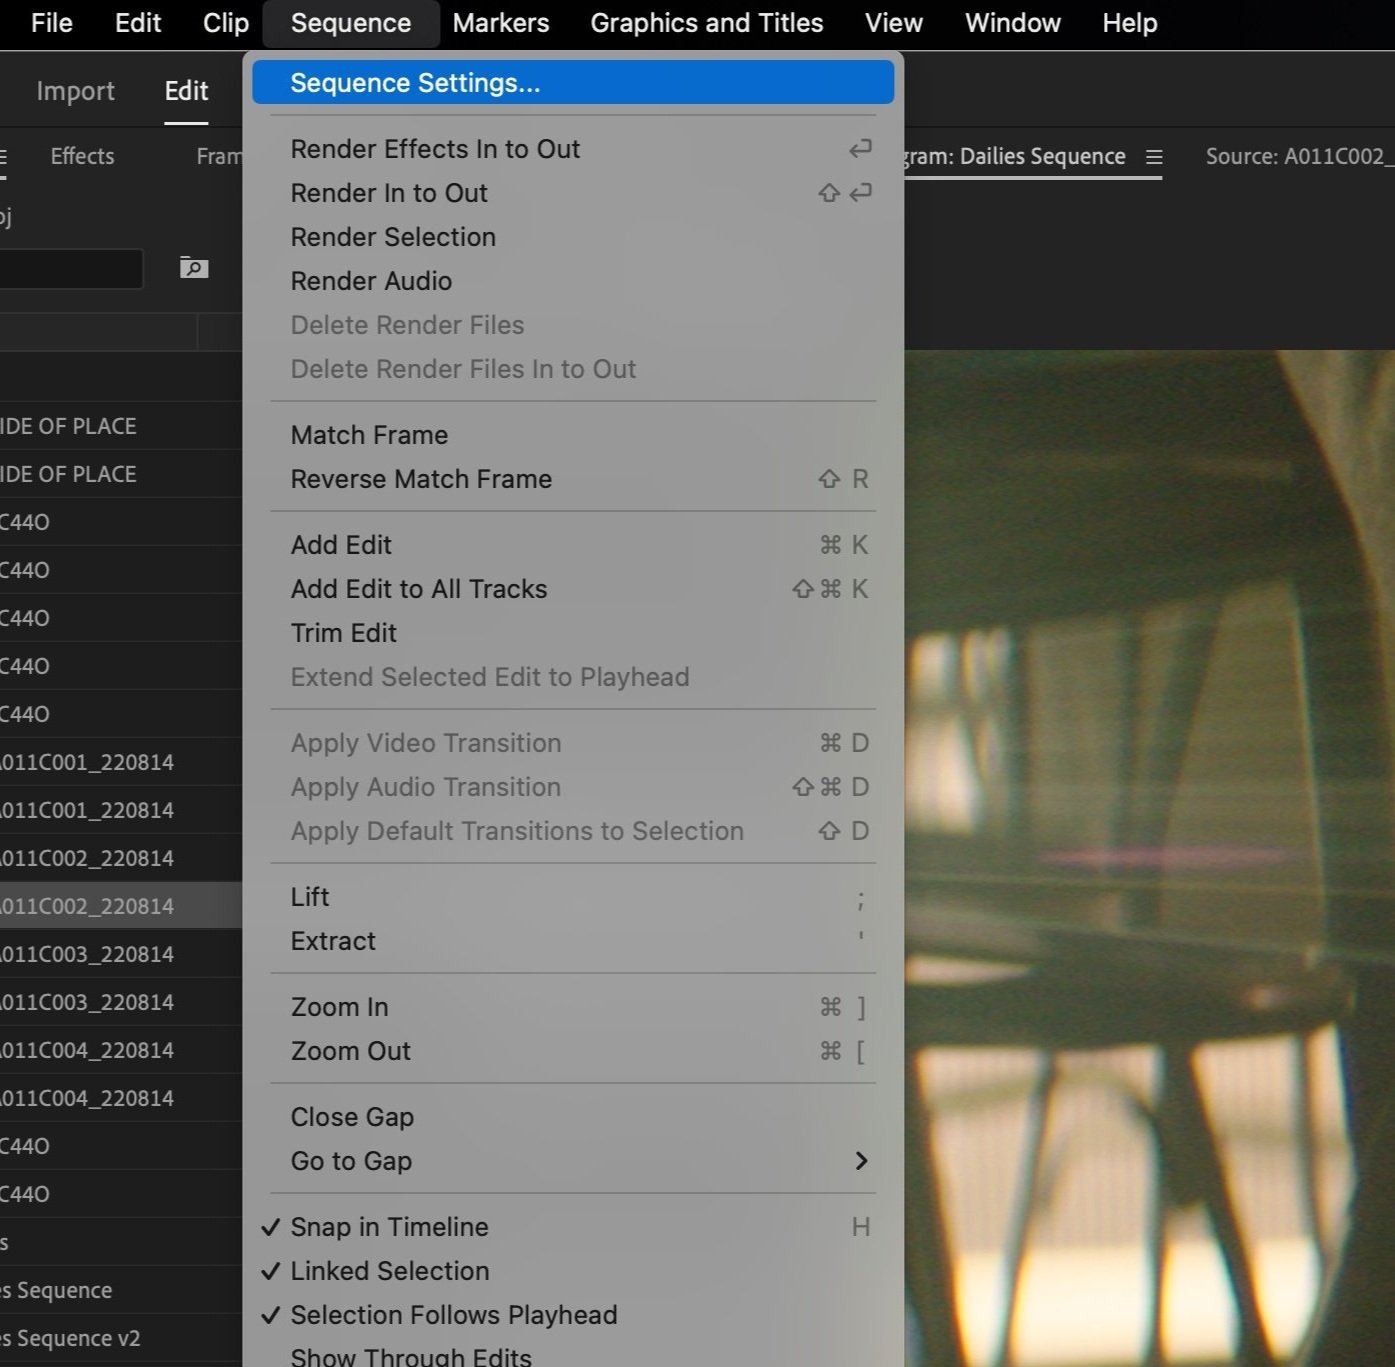
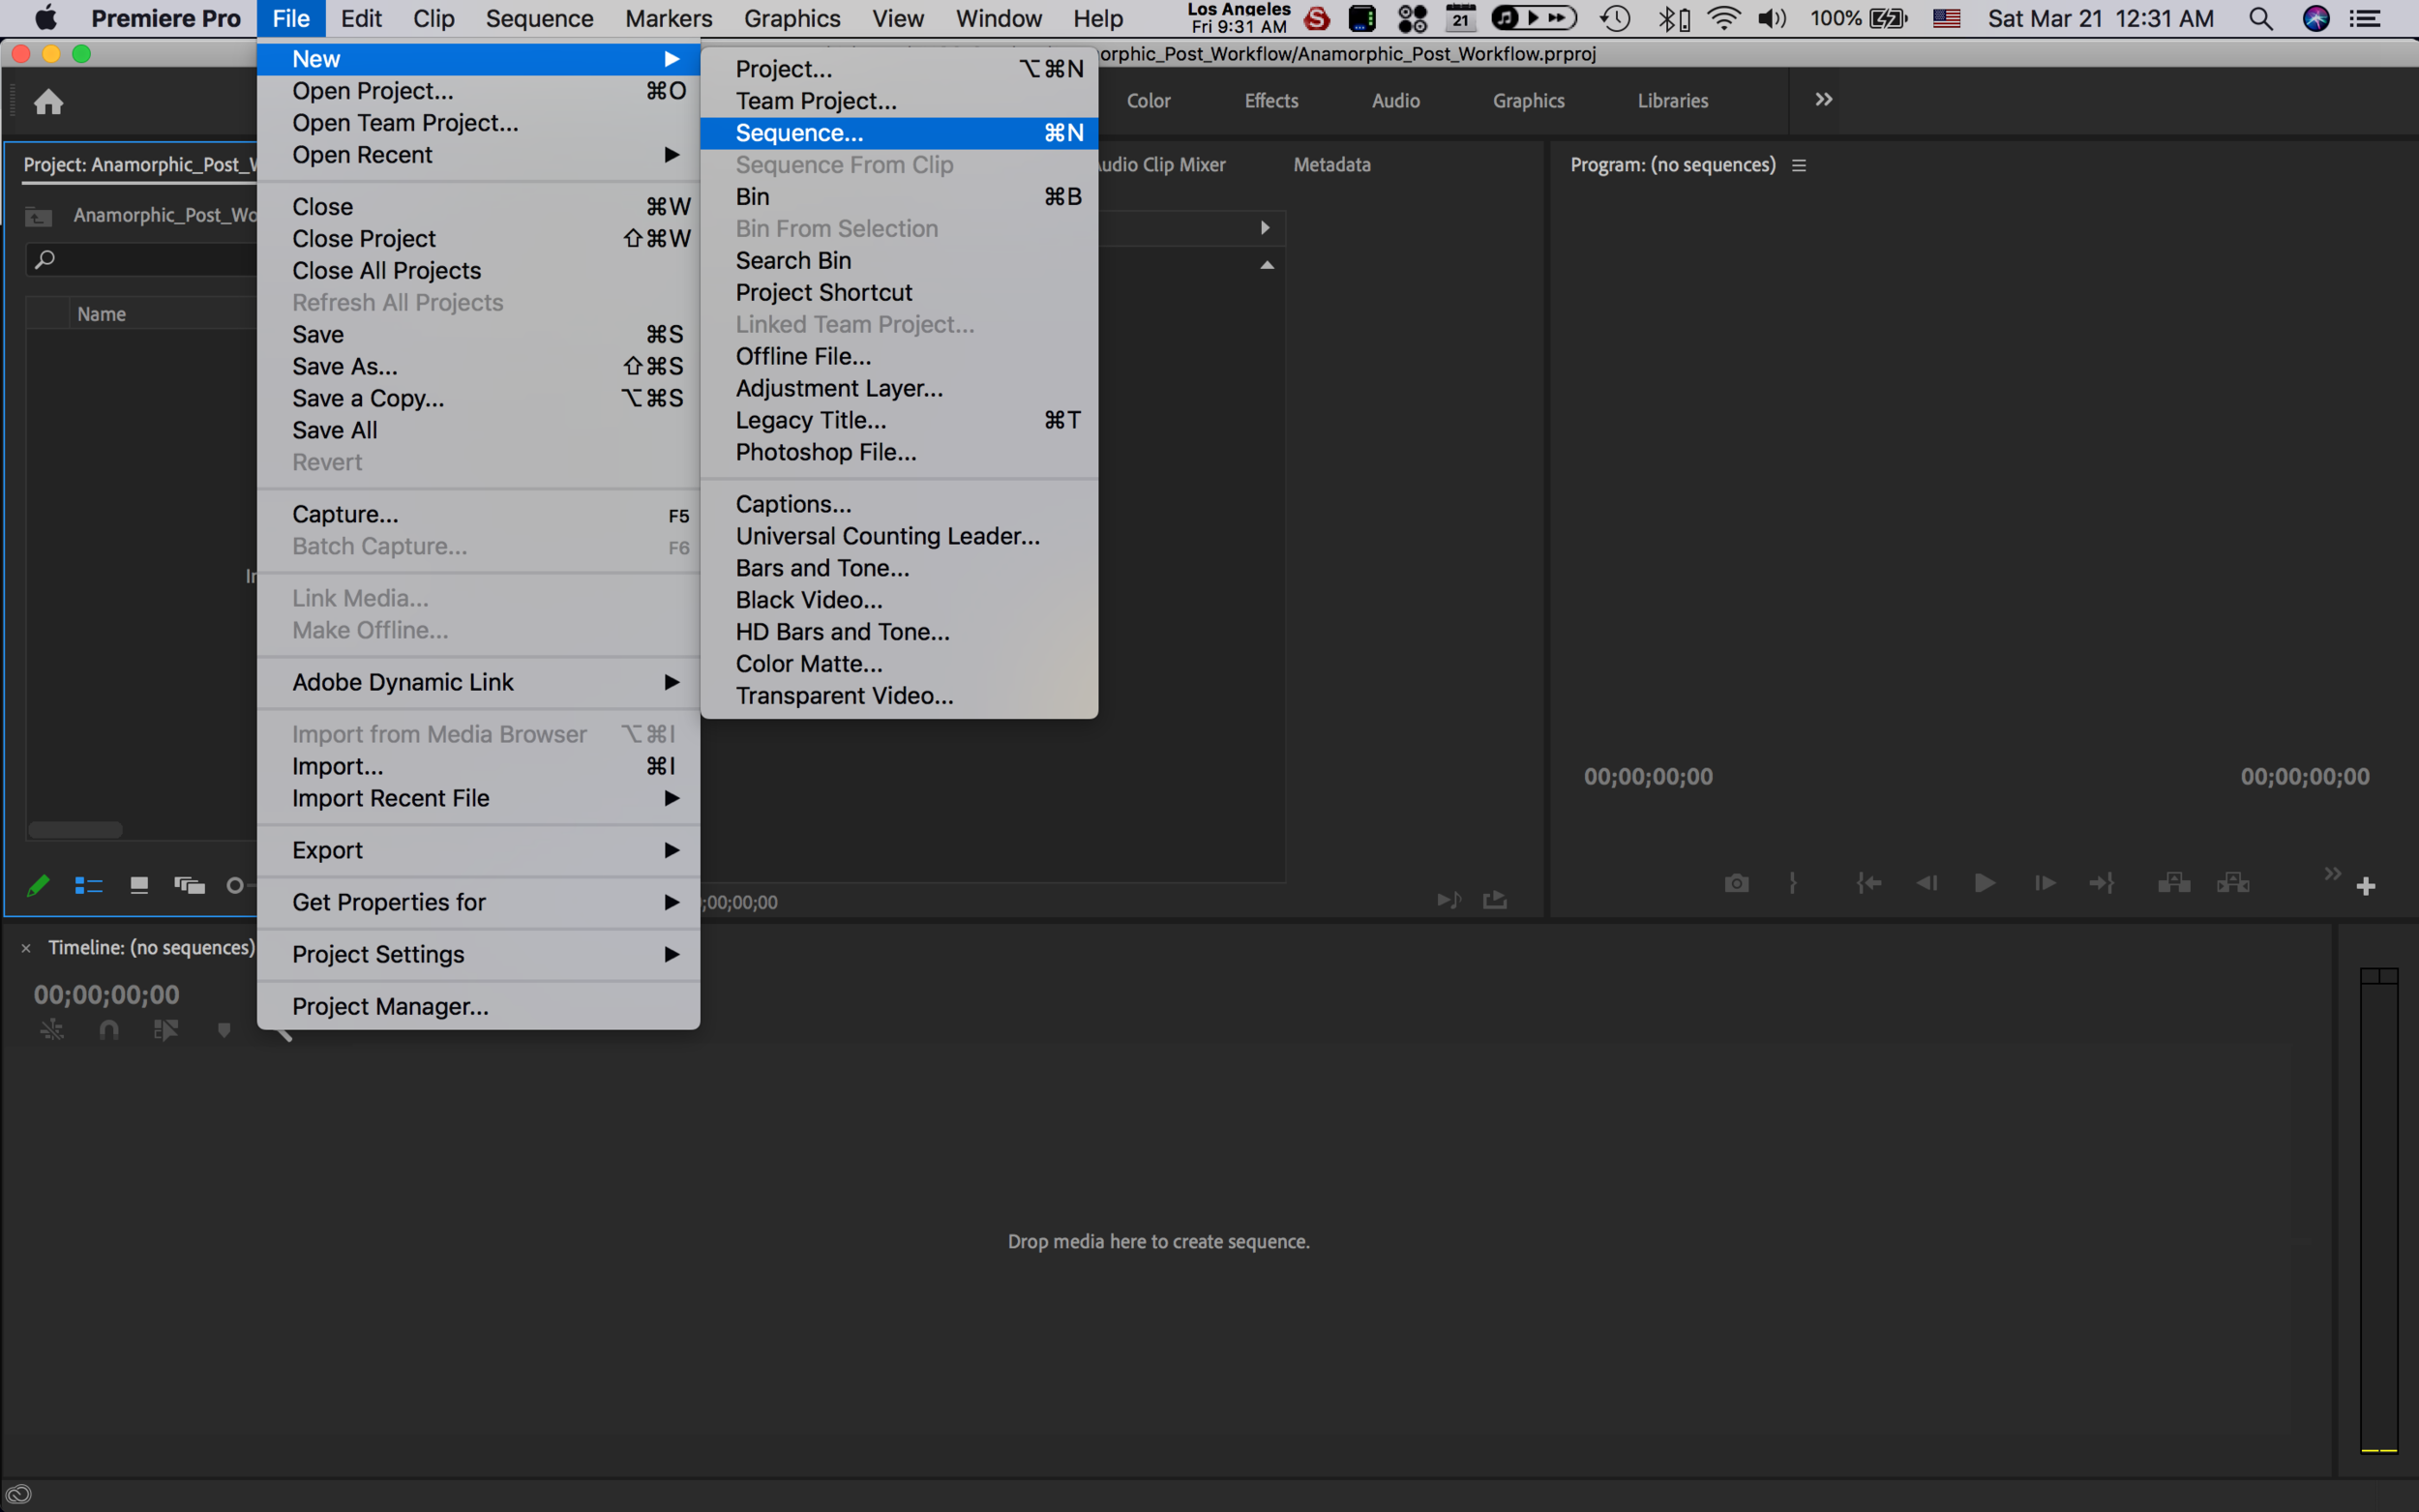
Step 2: Create New Sequence
Go to File -> Sequence
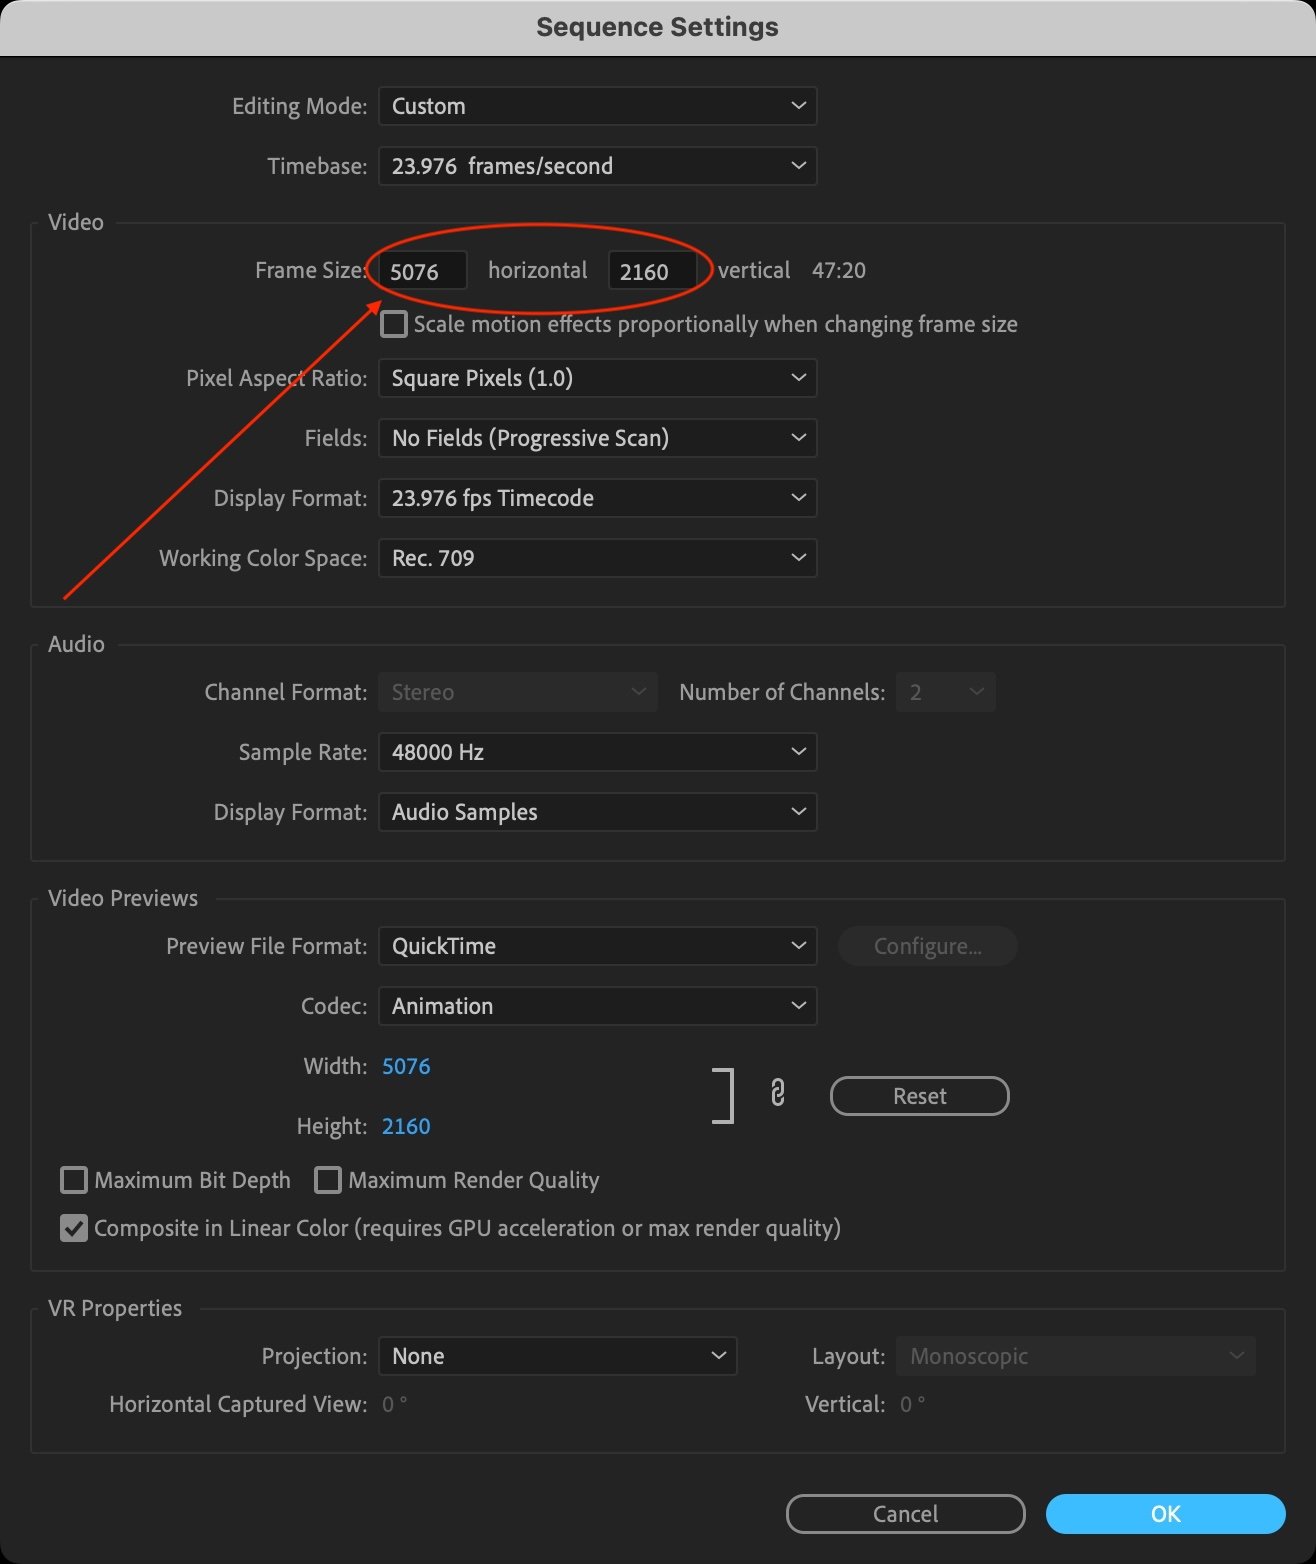
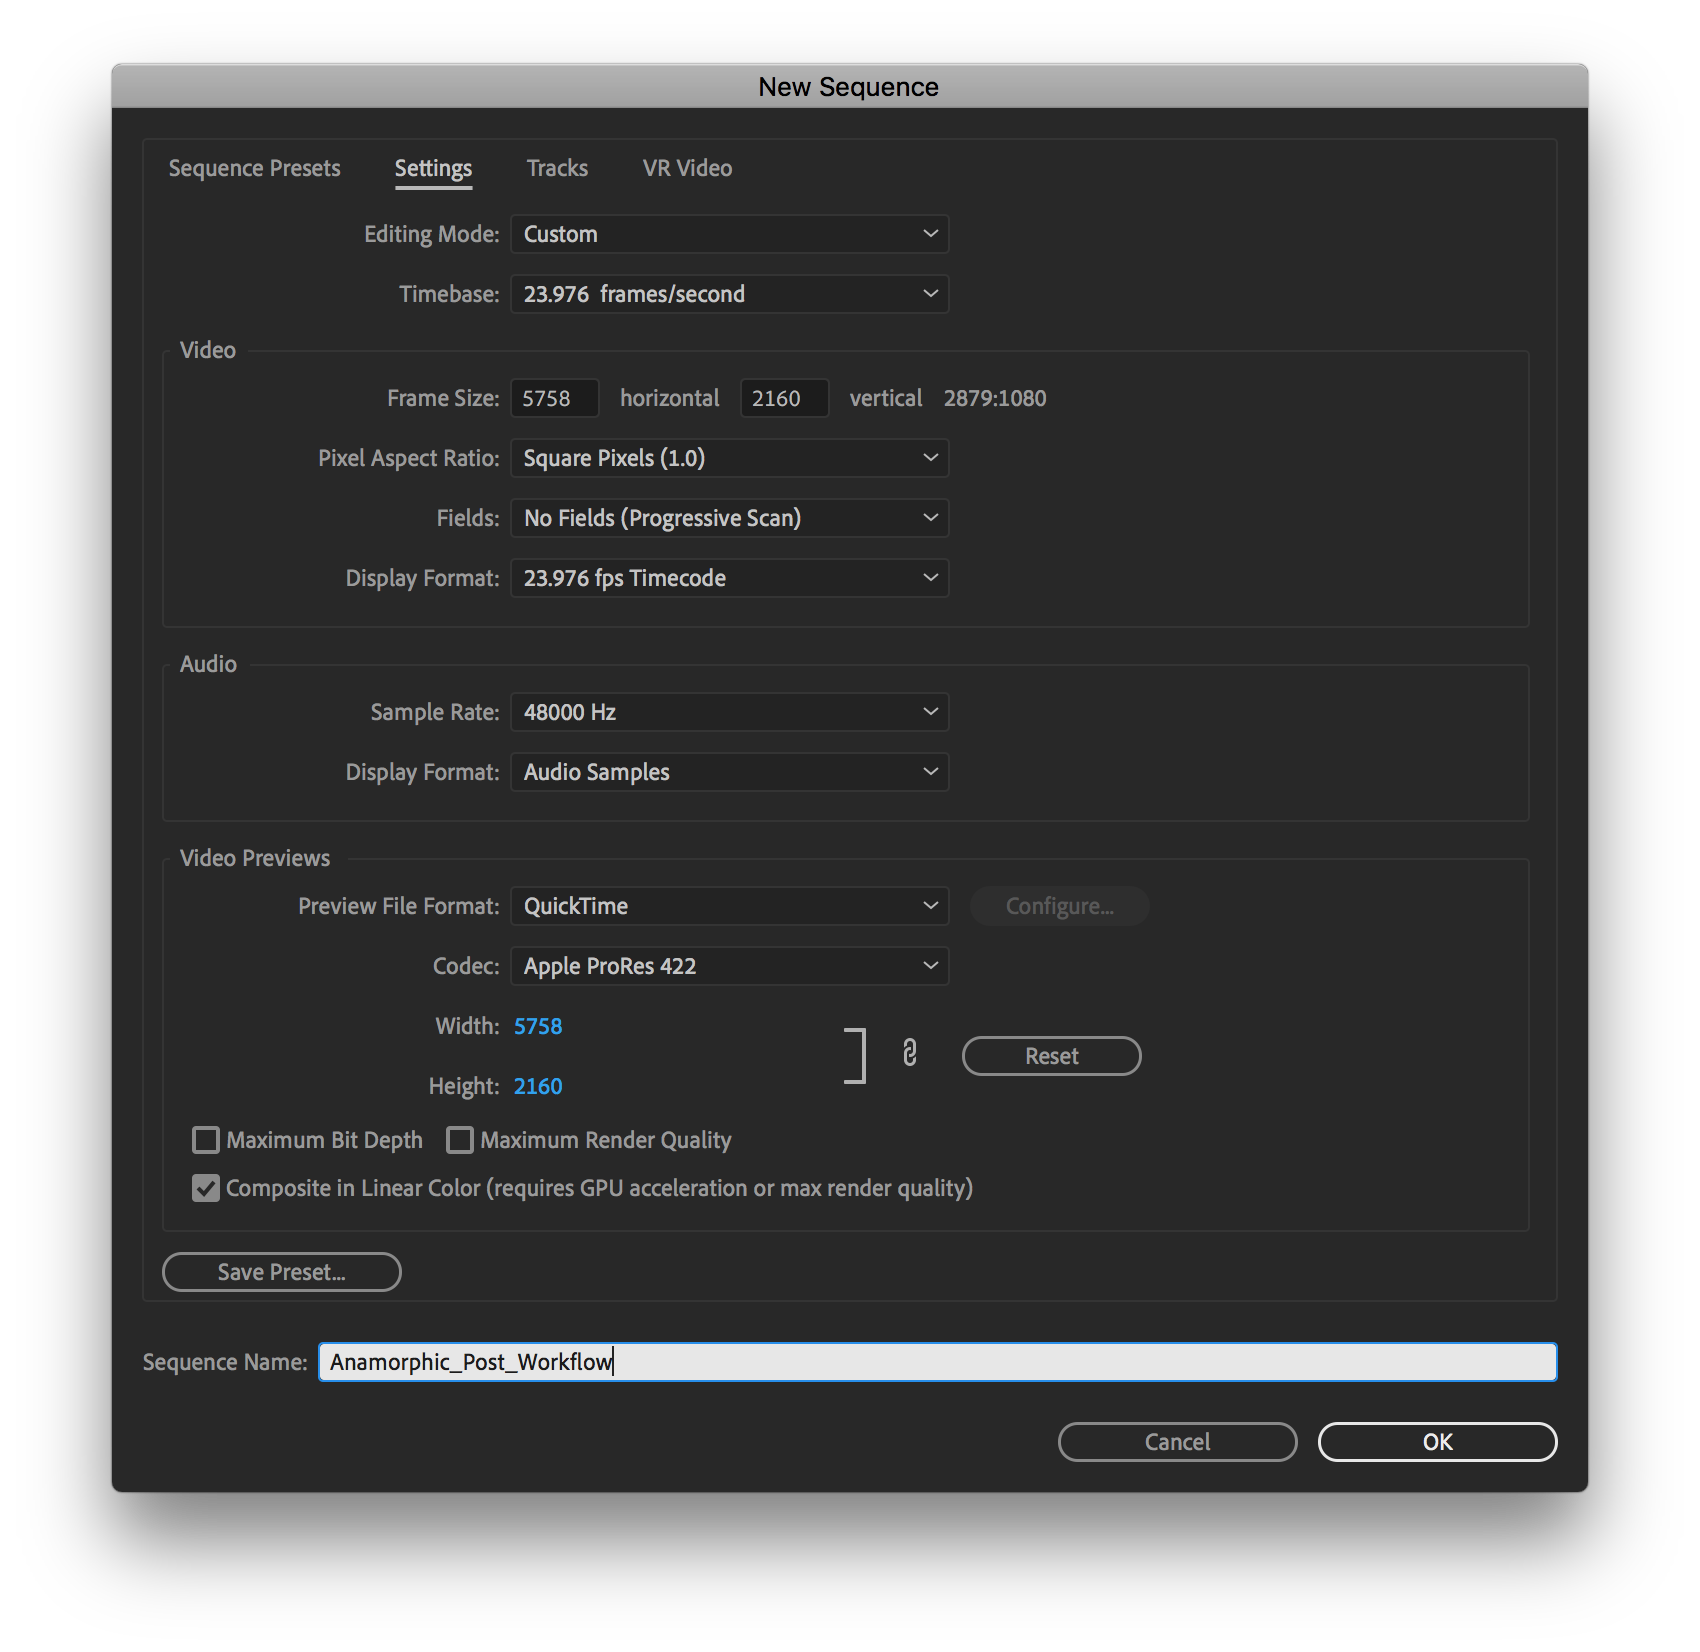
Step 3: Change setting for New Sequence
Go to the “Setting” tab at the top.
Change the settings to reflect the settings in the photo to the right.
Hit “OK”
RED WORKFLOW:
Technical Specs:
Camera Sensor: RED Komodo
Codec: R3D
Resolution: 6k
Anamorphic Squeeze Factor: 2x ( Zeiss Arri Masters, Cooke, Lomo, Kowa, Atlas Orion)
Open Premiere
Import (not ingest):
Media Browser -> Find Clip -> Right Click -> Import
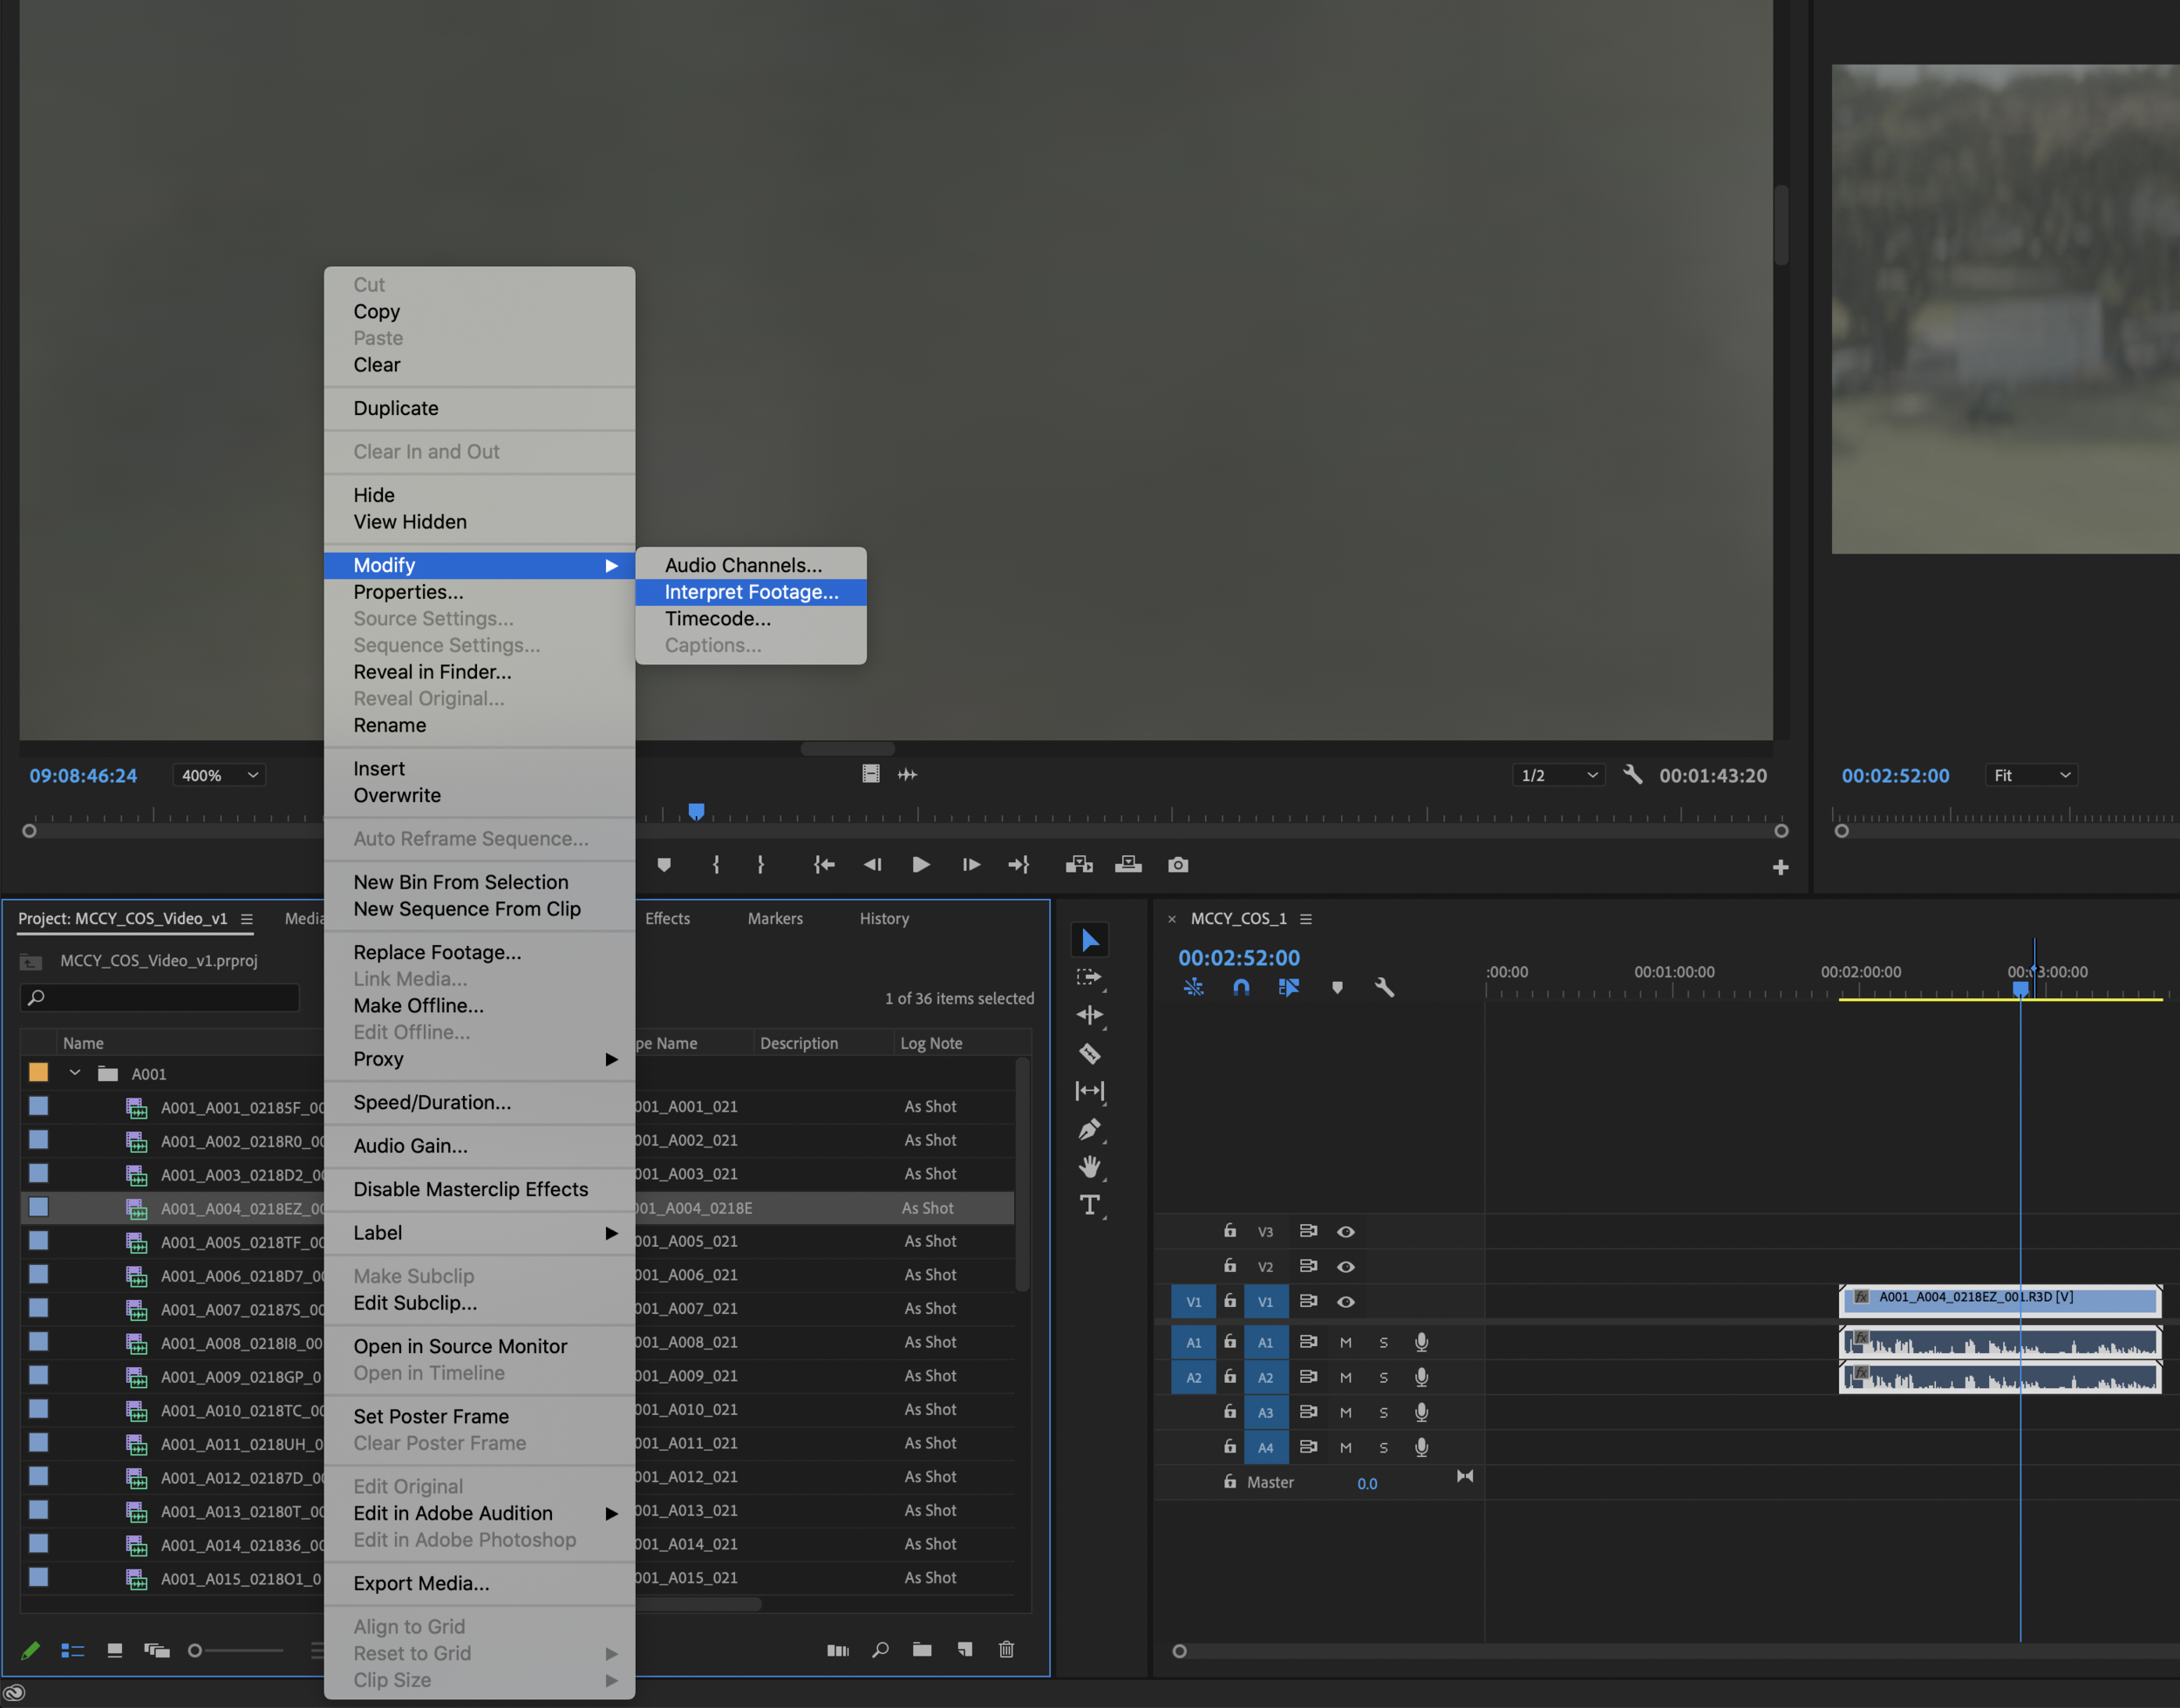
If footage is 6k, 25fps:
Right Click all files in Project finder -> Modify -> Interpret Footage -> Pixel Aspect Ratio -> Conform to: "Anamorphic 2:1"
If footage is 6k, 50fps:Right Click all files in Project finder -> Modify -> Interpret Footage -> Pixel Aspect Ratio -> Conform to: "DVCPRO HD (1.5)"
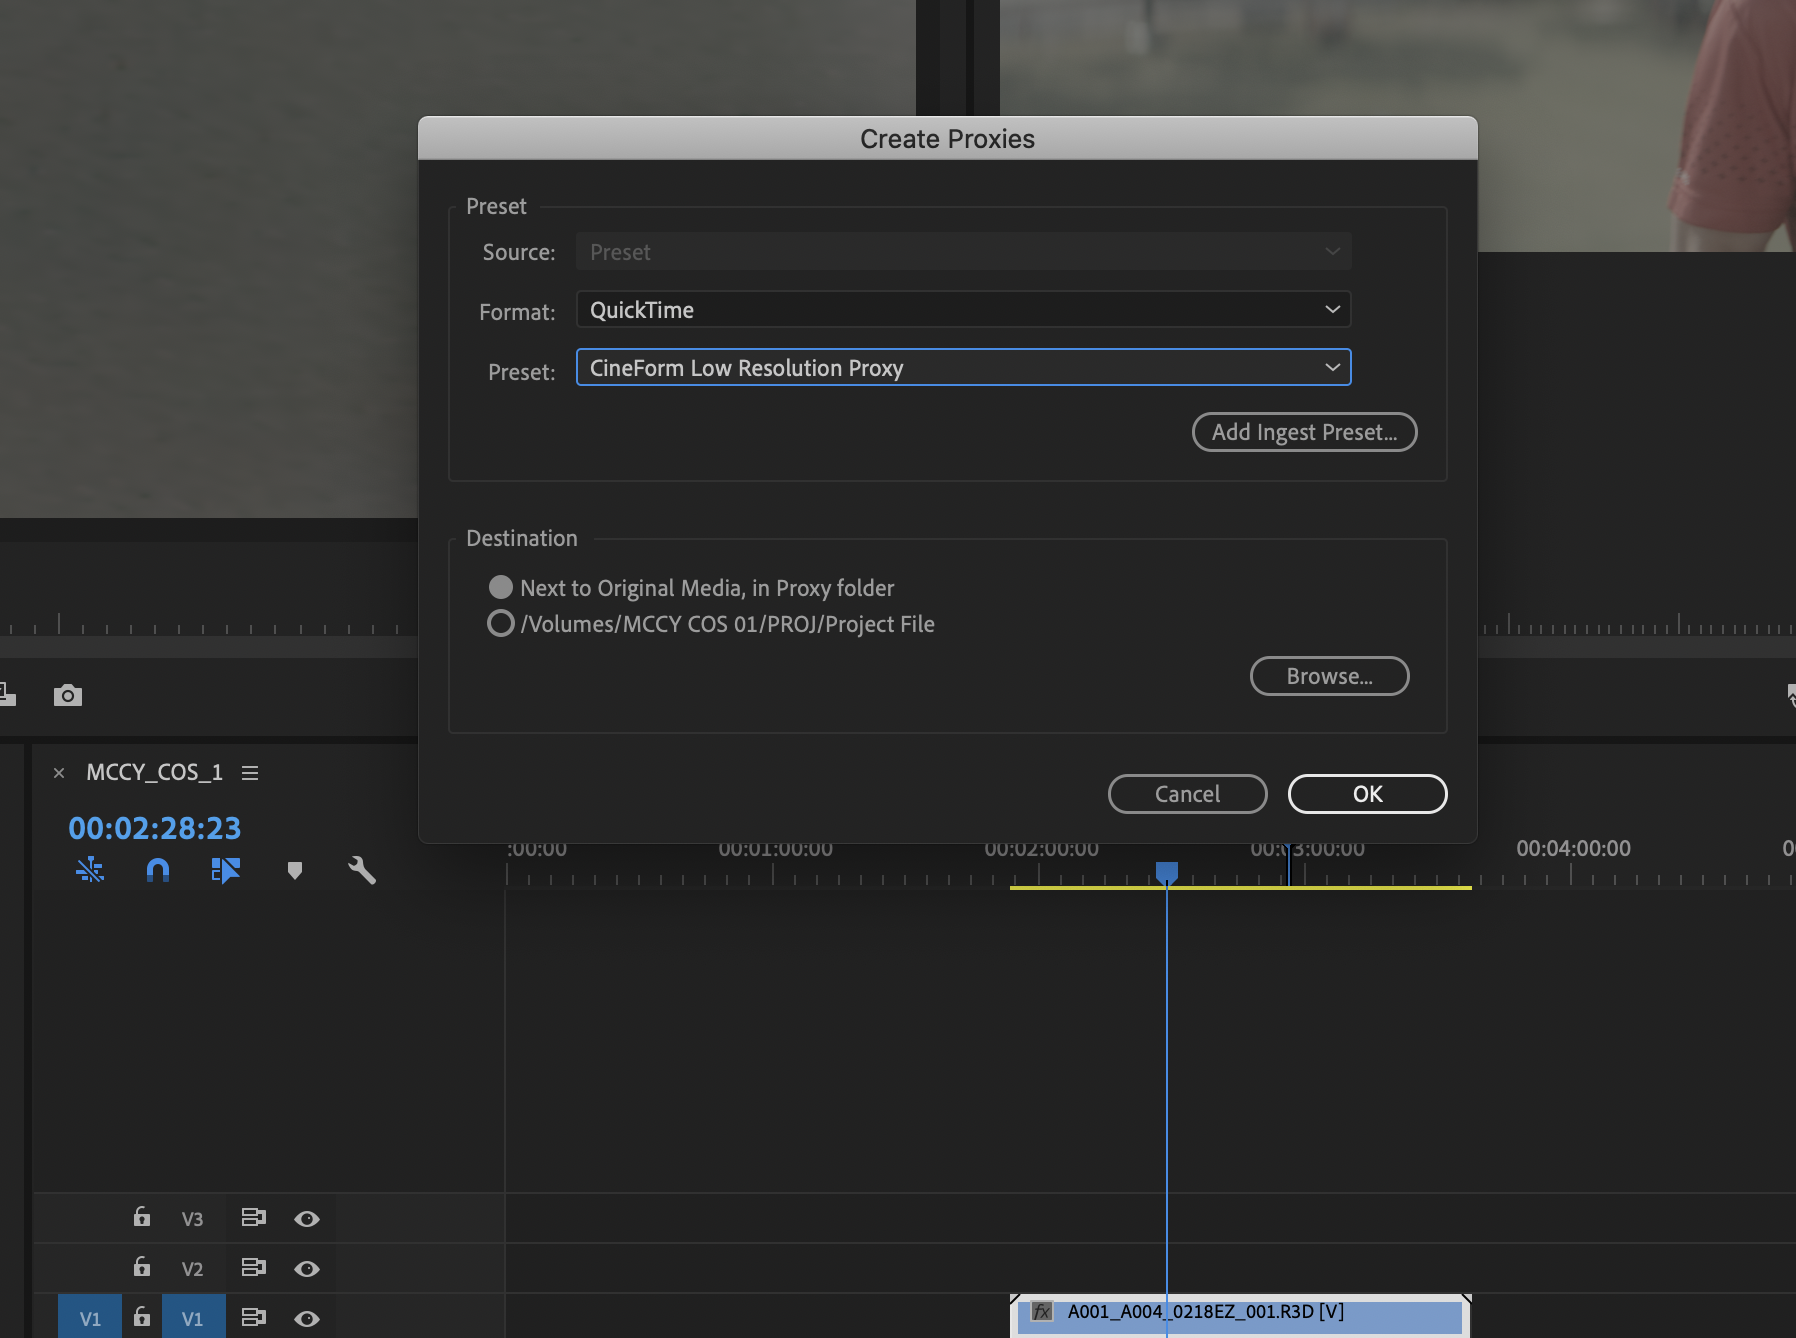
Right Click All Files in Project Finder -> Create Proxies -> Preset -> CineForm Low Resolution Proxy, check: "Next to Original Media, in Proxy Folder" -> Okay

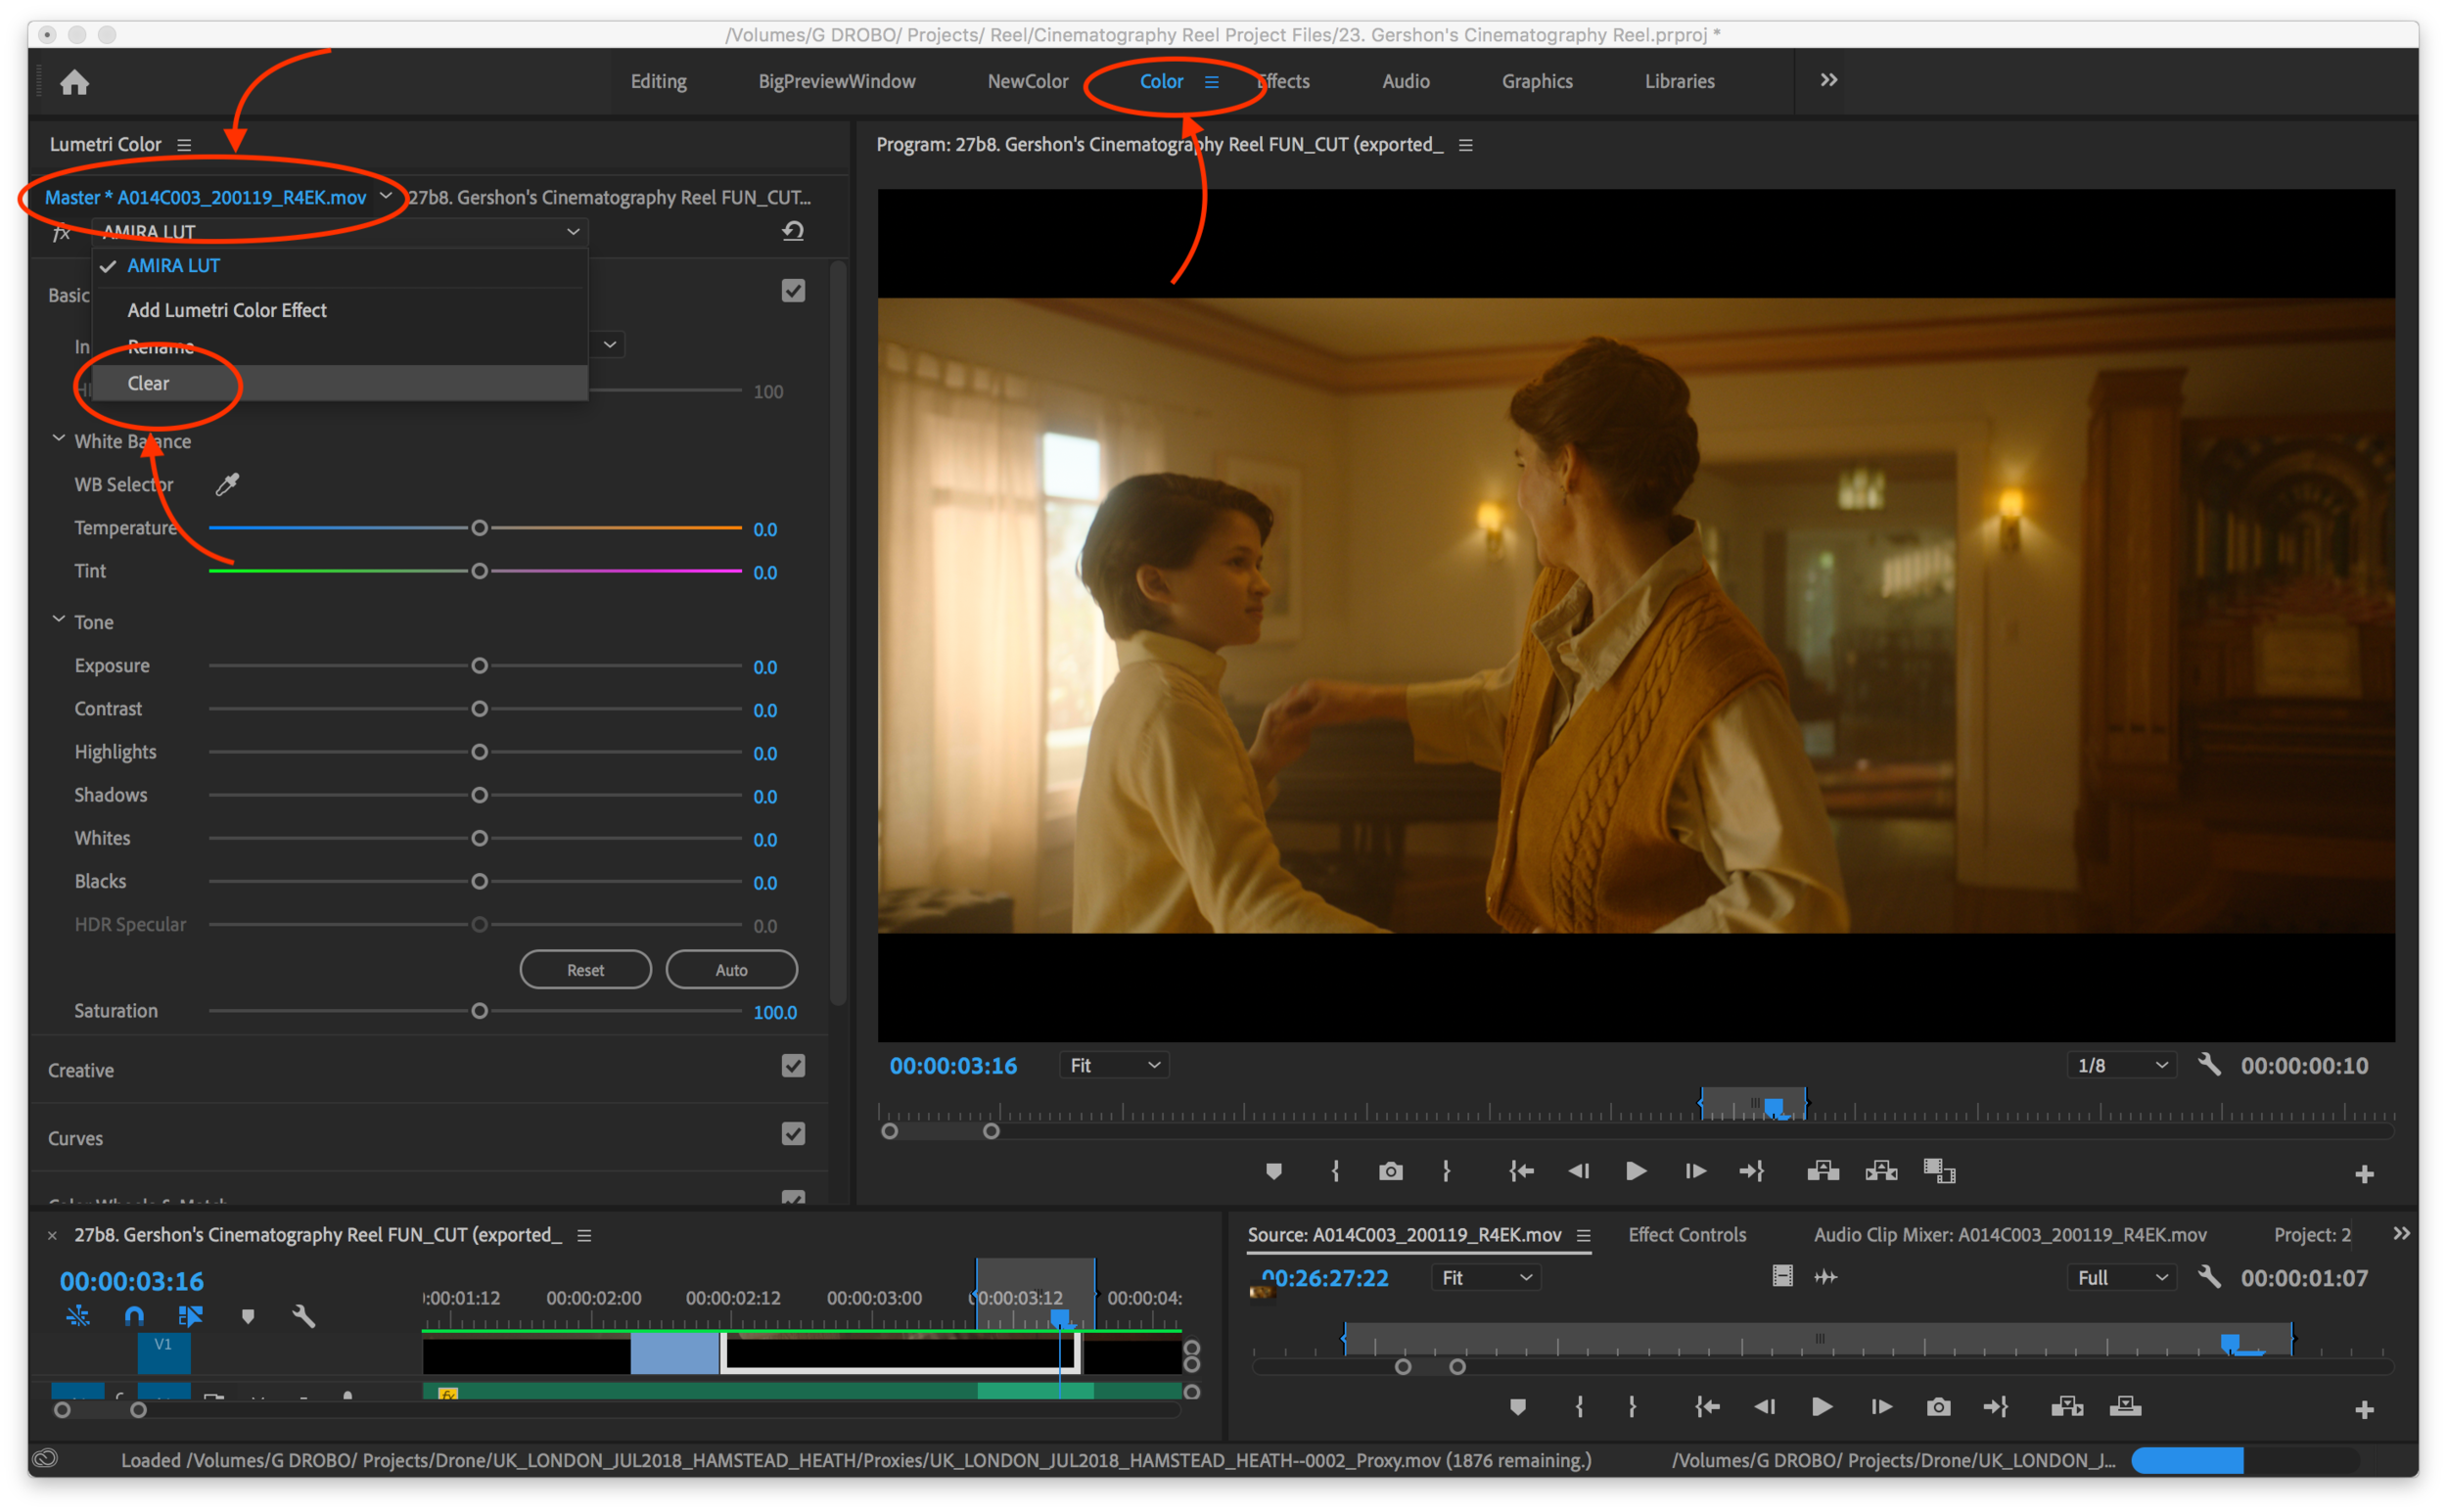
2. LUTs and Playback
Premiere Pro might automatically add a rec709 LUT to convert the Log footage. If you desire to remove the LUT, go to the “Color” tab on Premiere, then click on the “Master” tab on the left side of the screen, then “Clear”.
3. Export and Prep for Color
Color turnarounds vary from project to project. This is a non-exhausting list and is only based on my experience. There are 3 main workflows:
1. Directly in Editing Software:
Process:
Coloring directly in editing platform (premiere pro, avid, etc).
Advantages:
This is the easiest as it does not require export or turnaround logistic.
Disadvantage:
The colorist can only utilize the capability of the tools available on the editing software. Therefore, the grade may not have the same level of fine grading as a grade done in a professional software. The grading process will also usually take a lot longer as the tools in the editing software are not as efficient as the tools in the grading software.
2. .XML file and Offline Re-linking
Process:
Colorist will have all the assets (Dailies, VFX, etc) on a hard drive (with the same file structure as the editor). The editor will export an .XML file from Premiere Pro. The colorist will open that .XML in their color grading platform and link all the offline assets. The .xml file, in its most basic function, is a file with a series of instructions that tells the editing platform where all the cut points are.
Advantages:
This workflow provides the best quality outcome but can be complicated. Not ideal for long-distance, online grading session.
This workflow is good for editors who have made many visual effect adjustments (crops, fades, initial grade, vfx) directly into their editing software.
Disadvantages:
Colorist must have all the original assets, which can be a lot of data (100+GB for a simple music video/ commercial). The re-linking process is complicated and may take a longer overall time than a clean out workflow (below).
3. Clean Out
Process:
Editor will export a clean, High-resolution file to the colorist. The colorist will then detect the cut points on the color grading software, make the cuts themself, then start grading the clips.
Advantage:
This is a fair balance between the ease of turnaround and quality. It is a fairly quick handing over process.
Disadvantage:
All the VFX and assets must be completed before the export as everything will be “baked in” to the edit.
Here are the optimum export settings for a Clean Out: